How to Secure HTTPS Connection in Nginx Server with Let's Encrypt
Let’s Encrypt is a Certificate Authority (CA) that provides an easy way to obtain and install free TLS/SSL certificates, thereby enabling encrypted HTTPS on web servers. It simplifies the process by providing a software client, Certbot, that attempts to automate most (if not all) of the required steps [ref].
If you following preview post about How to Install Nginx and Setting Up Server Block, you’ll have an nginx configuration file called like example.com, for me is api.budidev.com. The file should be saved in directory /etc/nginx/sites-available and linking to /etc/nginx/sites-enabled.
In this post, I’ll show you how to enable HTTPS (SSL/TLS) connection for domain or subdomain in nginx server block configuration file. The configuration will automatically generated using Certbot by Let’s Encrypt.
You can see the official instruction by Let’s Encrypt to using Certbot here.
First of all, you have to connect to the server, if you use AWS EC2 instance as a web server, you can follow this post to connect to EC2 instance
Add Certbot PPA and Install Certbot
Add the Certbot PPA to list of repositories with the commands below
sudo apt-get install software-properties-commonsudo add-apt-repository universesudo add-apt-repository ppa:certbot/certbotsudo apt-get updateInstall Certbot with the command below
sudo apt-get install certbot python3-certbot-nginxGet an SSL Certificate and Automatically Configure
Run the command below to get a certificate and let Certbot edit Nginx configuration automatically
sudo certbot --nginxIf this is the first time running certbot, you’ll be prompted to enter an email address and agree to the terms of service

Certbot Email and Agreements
Choose the domain or subdomain you want to activate HTTPS
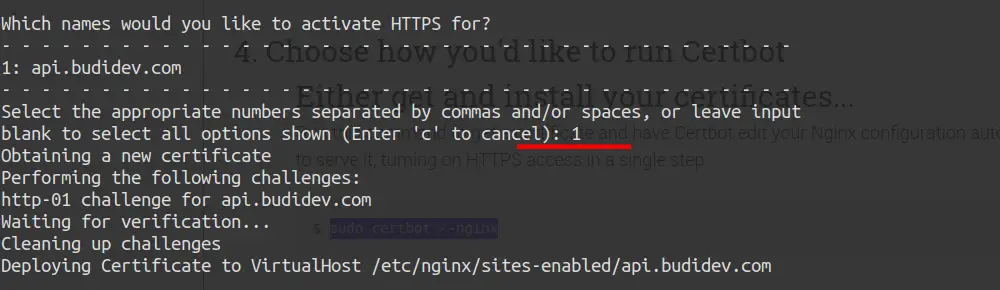
Certbot Choose Nginx Configuration File
Choose the options you preffer, choose option 1 so you can access web server via HTTP and HTTPS, choose option 2 to redirecting HTTP to HTTPS
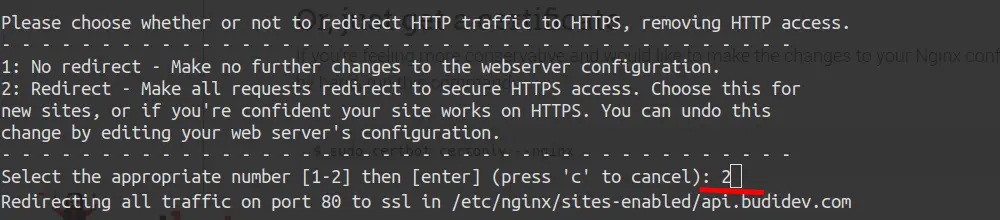
Certbot Choose Redirect or No
If everything works fine, certbot will print a success message with the important notes like the example below

Certbot Success Install Certificates
Now the certificates are installed, try to access web server in a browser using https connection, for me is https://api.budidev.com
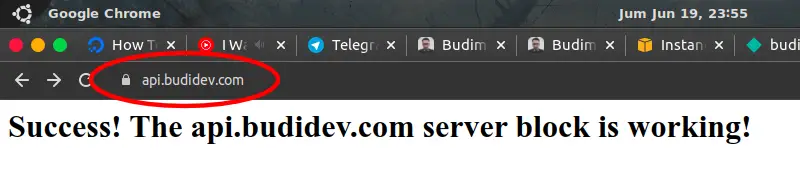
Success Secure HTTPS Connection
Test automatic renewal
The Certbot packages on your system come with a cron job or systemd timer that will renew your certificates automatically before they expire. You will not need to run Certbot again unless you change your configuration [ref].
You can test automatic renewal for your certificates by running this command:
sudo certbot renew --dry-run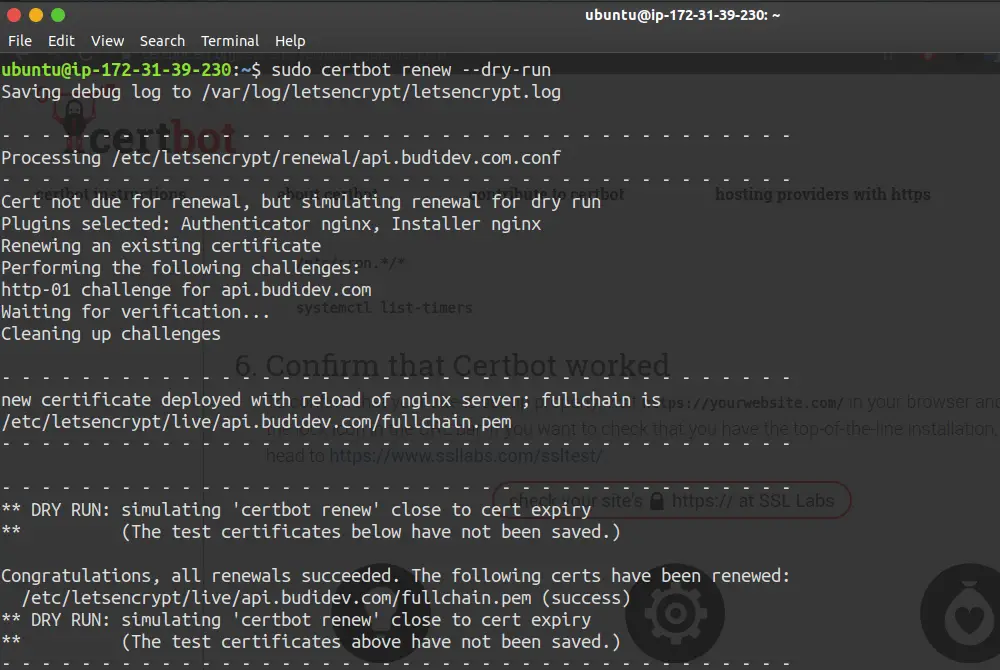
Certbot Success Test Renew Certificate