How to Install LEMP Stack (Linux, Nginx, MySQL, PHP) on Ubuntu 18.04 AWS EC2
AWS LEMP Stack
In this post I will show you how to install LEMP Stack on AWS EC2 Instance
L = Linux (Ubuntu 18.04)
E = Engine X / Nginx (1.14)
M = MySQL (5.7)
P = PHP (7.2)
Creating AWS EC2 Instance
First of all, you must have an AWS account, you can register here and get 12 months of Free Tier access from Amazon Web Service (AWS).
After registering an AWS account, sign in to AWS Console then choose EC2 Service, Launch new Instance then follow the steps with this options:
Amazon Machine Image (AMI): Ubuntu Server 18.04 LTS
Instance Type: General purpose | t2.micro
Instance Details: Leave to default settings
Storage: Leave to default settings or you can adjust the size (Max of Free Tier is 30GB)
Tags: Add your tags or you can skip this step
Security Group: Create a new security group with the rules below
| Type | Protocol | Port Range | Source |
|---|---|---|---|
| SSH | TCP | 22 | Custom - 0.0.0.0/0 |
| HTTP | TCP | 80 | Anywhere - 0.0.0.0/0, ::/0 |
Review Instance Launch: Verify the settings then click Launch
- A window pops up will asking you to select an existing key-pair or create a new key-pair. If you haven’t created a key pair before then create a new one, then
downloadit to your local computer. Thekey-pairis using to connect the Instance via SSH Client.
- A window pops up will asking you to select an existing key-pair or create a new key-pair. If you haven’t created a key pair before then create a new one, then
Connecting to AWS EC2 Instance
To see how to connect to your Instance, go to AWS EC2 Dashboard, navigate to Running Instances, select the Instance of Ubuntu 18.04 that launched before, then click Connect button. You will see a few info about how to connect to AWS EC2 Instance.
In this example, I use terminal on Ubuntu desktop as SSH Client to connect to AWS EC2 Instance.
Move the
key-pairfile you download before to~/.sshdirectoryOpen a terminal then apply
chmod 400to the file
chmod 400 ~/.ssh/your-key.pem- In a terminal, connect to your instance using Public DNS with the key-pair as identify file, Example:
ssh -i "~/.ssh/your-key.pem" ubuntu@ec2-13-229-132-71.ap-southeast-1.compute.amazonaws.comTo see your Public DNS or Public IP Address, go to AWS EC2 Dashboard, select your instance then see in Description Section.
Installing Nginx Server
After you successfully connect to your instance, now you can managing the instance as you want. To Setup the LEMP Stack, first update your instance packages
sudo apt updateThen install the Nginx Server
sudo apt install nginxOpen a browser then go to your Public DNS or Public IP Address of your instance to check that Nginx successfully installed.
htpps://your-public-DNS-or-IP-address
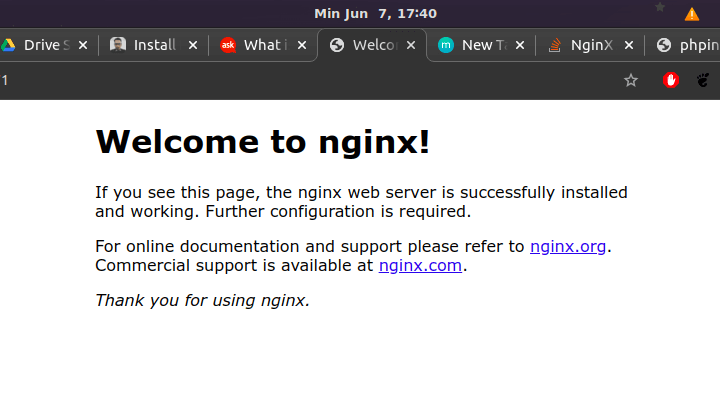
Nginx Welcome Page
Installing MySQL
The next thing to do is installing MySQL, use this command to install it
sudo apt install mysql-serverConfigure MySQL with this command
sudo mysql_secure_installationInstalling PHP
Install php-fpm, a stands for “fastCGI process manager” to tell Nginx to pass PHP requests to this software for processing
sudo apt install php-fpmInstall php-mysql to allow PHP communicate with database backend
sudo apt install php-mysqlConfiguring Nginx to Use PHP
Now the LEMP Stack are installed, but we have to configure Nginx to use PHP processor for dynamic content.
In this example, I will edit the default configuration server block of Nginx
First, backup the default configuration file
sudo cp /etc/nginx/sites-available/default /etc/nginx/sites-available/default.bakOpen default configuration file using nano
sudo nano /etc/nginx/sites-available/defaultFill with the content bellow
server {
        listen 80;
        root /var/www/html;
        index index.php index.html index.nginx-debian.html;
        server_name _;

        location / {
                try_files $uri $uri/ =404;
        }

        location ~ \.php{
                include snippets/fastcgi-php.conf;
                fastcgi_pass unix:/var/run/php/php7.2-fpm.sock;
        }

        location ~ /\.ht {
                deny all;
        }
}
Create info.php file to test PHP
sudo nano /var/www/html/info.phpFill with the content bellow
<?php
phpinfo();
Restart Nginx
sudo service nginx restartOpen a browser then go to htpps://your-public-DNS-or-IP-address/info.php
If everything works fine you should see PHP info page like this
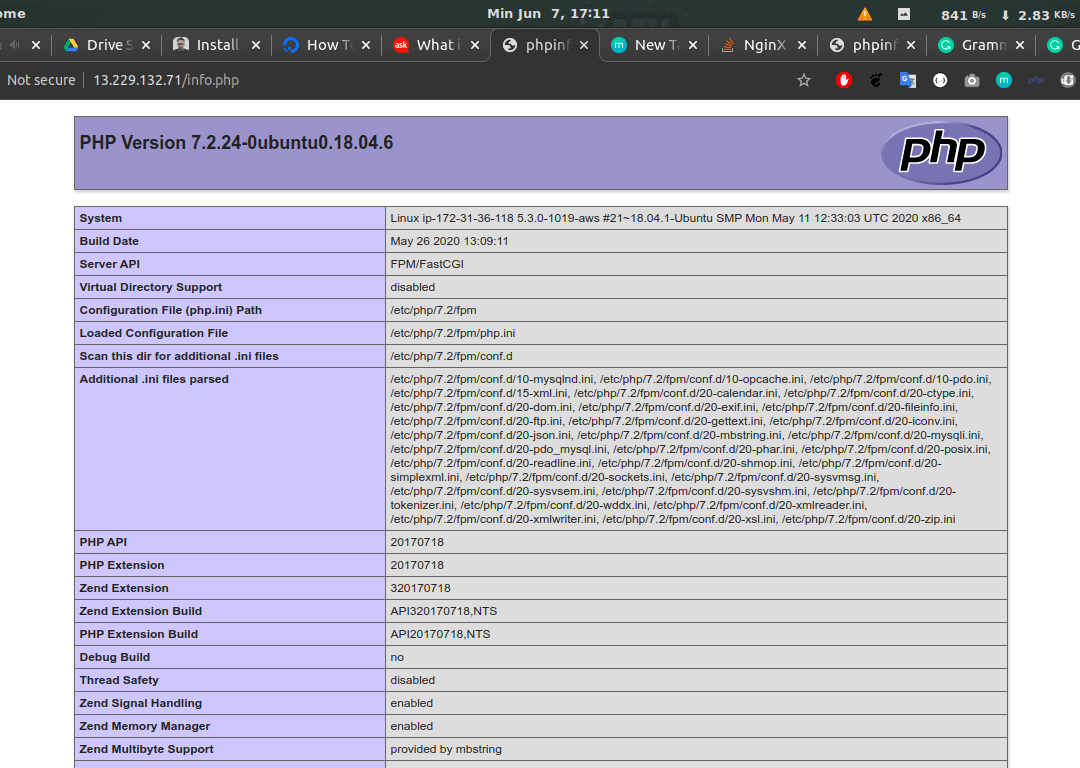
PHP Info Page